Wednesday, February 20, 2013

Paint codes...

White paint codes for 1976-7 cars  - 'NAB' code take from my comm plate on the inside of the near side door.

Colour
Comm Plate Code
BLVC Code
UNIPART Codes
Obsolete
Current
Alt. Code
GAP
GTU
PNM
White
NAB
206
153
153
-
Leyland White
NAF
243
415
415
6071
Pendelican White
NCF
215
625
-
6089
Porcelain White
NCG
-
485
485
-

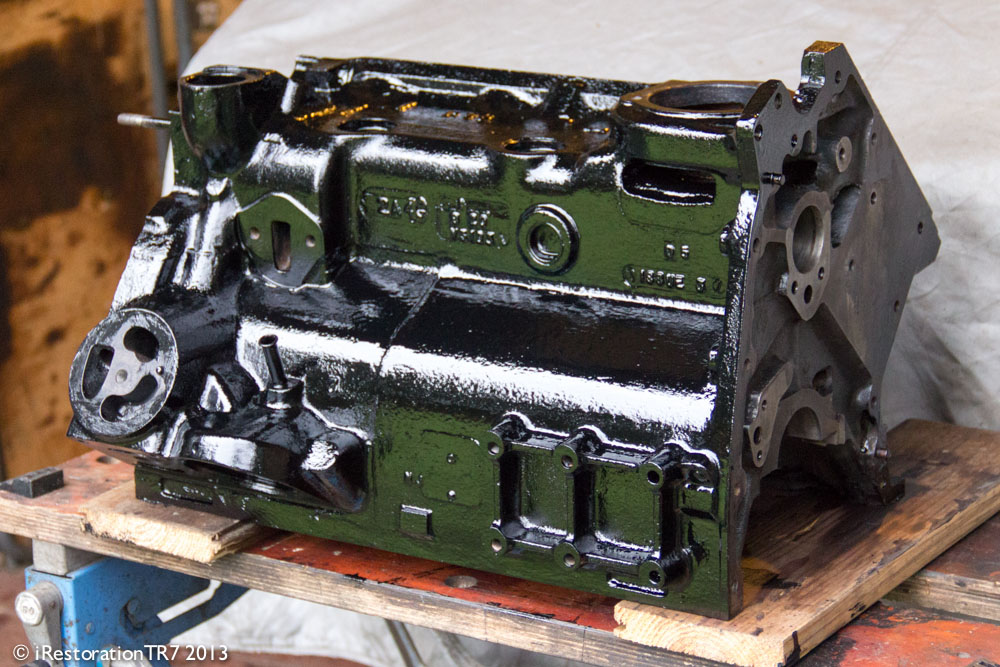
I know this post is a bit early but I can dream...

Engine stand mounting...

I fitted the rear engine plate to the block and offer up the stand mounting plate to see which hole lined up and what would be the best position.

After a lot of fiddling around I decided I would drill two holes to allow me to mount it centrally to two top gearbox studs, allowing the adjustable arms to reach vertically downwards spreading the weight evenly.

Only problem I had was finding the right length bolts and nuts, looking through my farther's old boxes of imperial nuts and bolts I finally found some.

2hr


Sunday, February 17, 2013

Sump pan...

With the wire brushes in the drill I removed the rust and flaking paint from the sump cover, degreased the inside ready for paint.

2hrs


Camshaft cover...

At the top of the engine the camshaft needs to look good - painted black or silver, chrome would be over the top - its not a v8.

After three goes with the paint stripper and finished off with the wire brush in the drill, some careful filling on some of the awful welding spots I had it looking fairly good.

Two of coats of primer and its ready for a top coat of...

3hrs


More cleaning and painting...

Engine lifting eye, block drain plug, timing mark plate (on timing cover), rear engine plate, timing chain tensioner assembly, rear crankshaft oil seal housing (new seal fitted), water pump cover and bypass connecter pipe all cleaned and painted as required.

5 hrs


Note the damage from the flywheel movement last time.


Engine stand...

At a recent TR social meet a member had spoken to a local mechanic who had some tools and an engine stand for sale. Good timing, I called him and picked it up on Saturday - £25 just needed some missing bolts.

2hr


Tuesday, February 12, 2013

Picture perfect...

Most of the photos for this blog are taken on my Canon 600D with a 18-135mm lens. I shoot in Raw format which produces a 26Mbs file. I then use Adobe's Lightroom 4 for post editing and export as jpeg at 1000pix wide, max 200k file size at 200dpi resolution.

I have over 840 photos so far which is just under 23Gbs of images and data files!

This photo was taken using my iPhone 4.


Saturday, February 9, 2013

Block paint...

With the weather a bit warmer today it was time to give the block a second coat. The first coat took a couple of days to dry in the colder temperatures.

The Kurust had done a good job sealing and giving me a great surface to paint, areas of over-paint I will clear off with a sharp blade.

2 hrs


Cleaning, cleaning, cleaning...

In preparation for the rebuild everything needs cleaning, so with the ultrasonic cleaner set a 99 minutes I started with the camshaft caps and bolts, crank big caps, cylinder head studs, bolts washers and on and on and on...

The timing cover has been soaking for about a week in degreaser and still very dirty - I think this going to need blasting or something.

4hrs

Monday, February 4, 2013

Replacement cover...

Finally found a replacement thermostat cover on eBay which was delivery today – £7.01 +p&p. After a quick look to make sure it matched the old one, into the cleaner and rub down with wire-wool then finished off with a coat of aluminium paint.

45 mins


Photo from 04.12.2011 blog showing corroded outlet

Sunday, February 3, 2013

Pistons ready...

20 minutes in the ultrasonic cleaner was enough to loosen the carbon from the piston heads. Using fine wire-wool to lift any stubborn bits.

As you can see the pistons are +020 oversized as the block is a recon unit due the thrust washers dropping out.

2 hrs


88°C – I wish...

Just as a reminder when ordering the Thermostat it needs to an 88°C (190°F) rating.


Engine block blue rinse...

With the block cleaned and degreased I gave it a couple of coats of Hammerite Kurust to convert the surface rust and seal it for the black engine enamel. As you can see from the photos the Kurust goes through many colour changes ending up a dark blue/black.

It's too cold today for the engine enamel so that will have to wait for a warmer day.

1 hr


Saturday, February 2, 2013

Engine breakdown... pt16 Completed!

Yes the final bit done - removing the crank from the block. Just four bolts on the front and rear main bearing caps holding it in place.

The crank looks ok, the big ends and main bearing surfaces are marked/stained from the sitting in the oil for so long, but I'm fitting new shells and this time I'm going to us a 20W/50 mineral oil for the first 500 miles of running in.

I then gave the block a good clean/degrease in preparation for a coat of black paint and the rebuild!

3 hrs