Friday, August 31, 2012

Track rod ends...

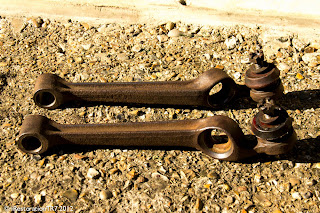
While the other front suspension parts are waiting for a second coat of paint, I started on the track rod ends, lower steering shaft and rack.

I was having a real problem with the off side track rod end – as it was only attached to the tie rod lever, I couldn't get a good grip on it to undone the nut. After 45 minutes of trying everything I decided that if I remove the whole steering rack I could put it in the vice.

So I started by removing the 2 bolts on the lower steering knuckles and the 4 bolts holding the rack to the front subframe. By sliding the rack over to the near side and folding down the lower steering shaft I managed to pull it out through the off side gap.

With the compete rack on the bench I removed the lower steering shaft and the near side track rod end.

The off side rod end which I had been having so much trouble with still wouldn't undone, even trying some heat - it wouldn't move!

Looks like I may need to cut this one off – but first I will soak it over night with old friend WD-40.

3.5 hrs


Monday, August 27, 2012

A week of WD-40...

So after a week of socking the tops of the strut and no movement it was time for heat. With a new gas cartridge fitted and the strut held in the vice by the retaining nut – I gently heated the surrounding area. Using a large ring spanner on the other end, it unscrewed like a hot knife through butter or WD-40!

I repeated the process on the other one and then started the stripping and cleaning for painting.

4.5 hrs


Monday, August 20, 2012

Rusty tops...

To remove the strut inserts I need to unscrew the retaining nut which you guessed it - is rusted!

So, every time I go down the garage or pass them I squirt them with WD-40 - It may and probably will resort to some heat to free the joints.

1hr


Front anti roll bar...

With both ends free, I removed the four bolts holding the anti roll bar to the subframe witch as you can see from my photos I had fitted a Anti-drive spacer blocks 30 years ago after reading a article in a magazine on improving the TR7 handling.

My father made them up for me because at the time no kits where available. 16mm spaces was the preferred size – lots of info on this subject has been written since, so I will need to see when fitting uprated bushes, spring and inserts what the correct size is.

2 hrs


Front suspension removal...

I started by giving all the parts a good dose of WD40 to loosen everything up!

First I removed the nuts from the ends of the Anti roll bar, then the Tie rod lever allowing access to the Ball joint split pin and nut. Refitting the 'castle' head nut upside down and giving it a good hit to free from the strut leg.

Then removing the bolt from Track arm on the subframe, then the three nuts holding the suspension to the turret I carefully lifting the assembly away from the car. I repeated this for the other side.

Stripping down strut leg started with a ring around to see if I could borrow a spring compressor tool – but no luck.

A very good and old (that's number of years I've know him!) friend Nick came to my rescue with the  idea to using straps, as the road spring are 35 years old and knackered we could compress them using straps he had – which we did.

I will need to buy the right tool when fitting the uprated spring.

I then started cleaning up some of the parts for painting.

6 hrs


Sunday, August 12, 2012

Down under pt7...

Finally last of the bl**dy under seal to remove! Front near side wheel arch – not too bad, some minor rust spots will need attention with welding patches.

The outer wing edge is fairly rusty, so depending how bad may consider a repair panel.

5 hrs

Before


Friday, August 10, 2012

Down under pt6...

With the car out of the garage for the second time and both near side wheels up on the ramps, I wire brushed the surface rust off the floorpan, also removing the under seal from the sill.

Cleaned up an area just in front of the trailing arm fixing point which has a split in the metal on the angle – this is going to need repairing.

Also cleaned off the filler from the rear sill/lower panel - not as bad as the other side.

Finished off with a coat of Hammerite Rust Beater.

4 hrs


Sunday, August 5, 2012

Loft space...

Not sure but I think I have more parts in the loft than on the car or in the garage!

Many boxes of parts, interior/exterior trim and glass tucked away safe.


Sitting pretty or not...

Next removing the seats, four bolts and wires disconnected and lifted out.

The drivers seat has had some repairs to the front vinyl side panel about 25 years ago – time to do it properly, also a split in the piping will need replacing or repair.

I need to strip the seat completely as I think the frame may be broken and some welding required.

1 hr