Showing posts with label Gaskets. Show all posts

Saturday, April 20, 2013

Engine rebuild pt5...

Fitted the recon water pump into block and with a selection of gaskets to get the correct clearance between the pump top bolt and the inside cover flange.

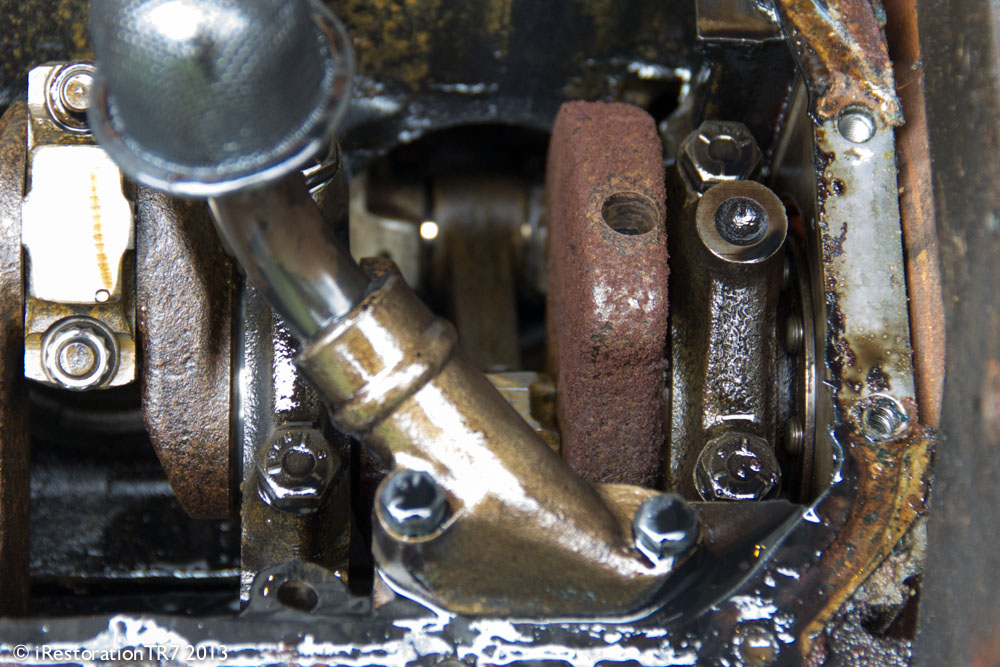
Also cleaned and fitted the oil cooler transfer housing adaptor to the block - fitted the oil pressure switch/pressure gauge T pipe - I going to refit the Smiths gauges I had removed when stripping car years ago. The oil cooler also has a temperature gauge and two others I have are a vacuum and water temperature if my memory recalls - I think I need to go and find them!

Dropped in the distributor and cam cover for these pics - looking good.

2hrs


Monday, January 28, 2013

New parts...

Received a box of goodies - shells, thrush washers, top and bottom gaskets - VAT free offer from Rimmers.


Tuesday, January 8, 2013

Engine breakdown... pt9

The oil pick-up pipe and strainer was full of the thick sludge oil from the sump.

I've order a 2 litre Ultrasonic cleaner which I'm hoping will help with all this cleaning especially the SU carbs when I get on to them.

Two bolt remove and lifted it off, yet another gasket to scrape off.

30 mins


Monday, January 7, 2013

Engine breakdown... pt7

Carefully flipping the engine over gave me access the to the sump pan, after give all the bolts and nuts a good covering of WD40, I removed the front left hand engine support member/bracket then lifted off the sump.

In the bottom was a very thick layer of old oil which I sharped out and cleaned off the remaining gasket.

30 mins


Engine breakdown... pt6

Next the camshaft, followers and shims. I loosening the nuts by a quarter of a turn one by one until the cam lifted up and was free of the followers.

Using an old flower seed tray cutdown to eight pots, I marked one to eight on the sides so I can refit them in the same order.

My valve spring compressor tool is not deep enough so to clear the top flange, so I will need to buy or borrow.

Also sent time cleaning all the old gaskets off and removing the water transfer housing/gasket from the rear of the head.

2hrs


Saturday, December 1, 2012

Gearbox assembled...

On the first day of December I'm in the garage and it's only 3 degrees outside. With the parts ready I started by bolted on the top cover, side bracket and rear mounted plate. Using a couple of bolts at the top I positioned the bellhousing to ensure the three spring where in place and inserted the rest.

Then I fitted the release bearing with the arm assembly in place, all it needs now is oil.

1hr


Monday, November 19, 2012

Gearbox paint job...

So with all the parts cleaned and degreased I gave the top cover, release bearing assembly and mounting brackets a coat of premier followed by black gloss. Masked off and cover the gearbox and repeated the process.

On the bellhousing the front end cover oil seal needed replacing, using a screw driver I lifted out the old one.  With drop oil around the new seal and large socket I pushed it in to place.

With new gaskets and allowing the parts a few days to dry in this colder weather, I can reassemble and store away in the loft - made myself gearbox stand too, very posh!

4hrs


Thursday, November 8, 2012

Bellhousing ringing...

Started by removing the release bearing assembly and bearing, then seven bolts being careful to catch the three compression spring inserted in the casting.

Cleaned off the old gaskets and given the bellhousing a first clean inside and out, also striped off the brackets from the rear of the gearbox for clean/painting.

2 hrs


Saturday, October 27, 2012

Sealed with a gasket...

Amongst all the parts I had stripped off before there was a large envelope of gaskets and o rings, should hopefully save a few pennies, also a good friend gave me some gaskets and bits left over from his years of looking after his MGB GT – some parts and bits are shared.