Showing posts with label Floorpan. Show all posts

Friday, May 9, 2014

Floor panel repaired...

When removing carpeting and sound proofing I found a couple of some rust holes in the drivers floor panel.

Using a card template I cut out the patch and folded and hammered into shape. After treating the area with Kurust and seam sealer I welded it in place and finished off with a coat primer to seal until I paint white later when the new sill is fitted.

3hrs


Monday, April 21, 2014

Front drivers floor panel...

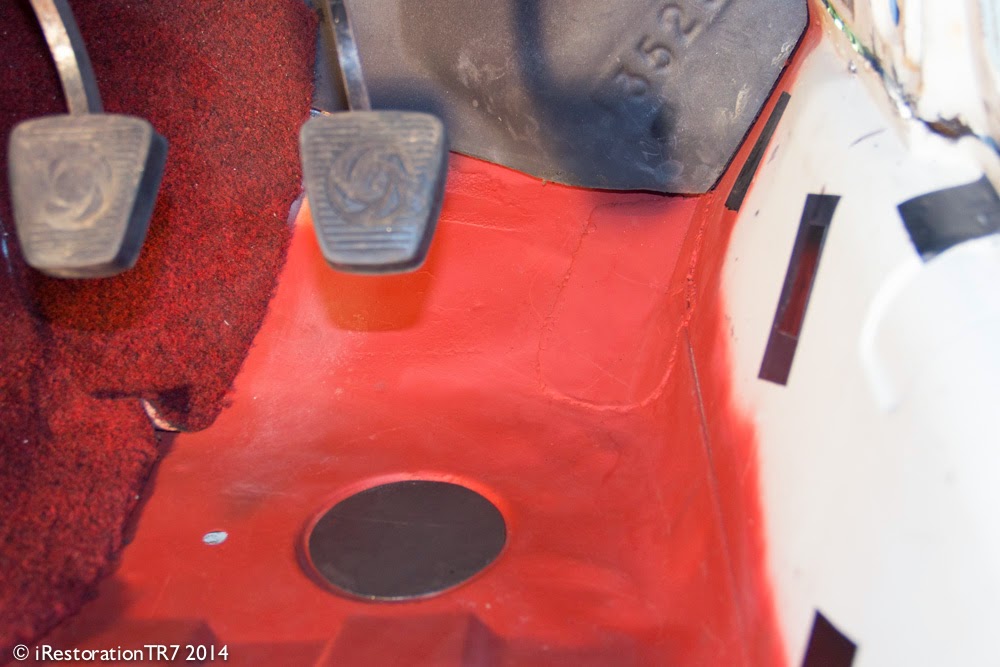
In preparation of removing the sill I raised the car up on axle stands and ramps to a good working height. Removed some of the carpet and rear bulkhead trim.

The sound insulation pad on the floor panel was cracked around large plug - I started digging around to find under pad was rusty, after cleaning off all the insulation I found a small hole in the corner – looks like were the seam sealer was used now has surface rusted along the joints - well done Triumph!

The inner sill was cover with 37 years contact adhesive from the carpet so with some white spirit I spent about hour and half cleaning it back to white paint.

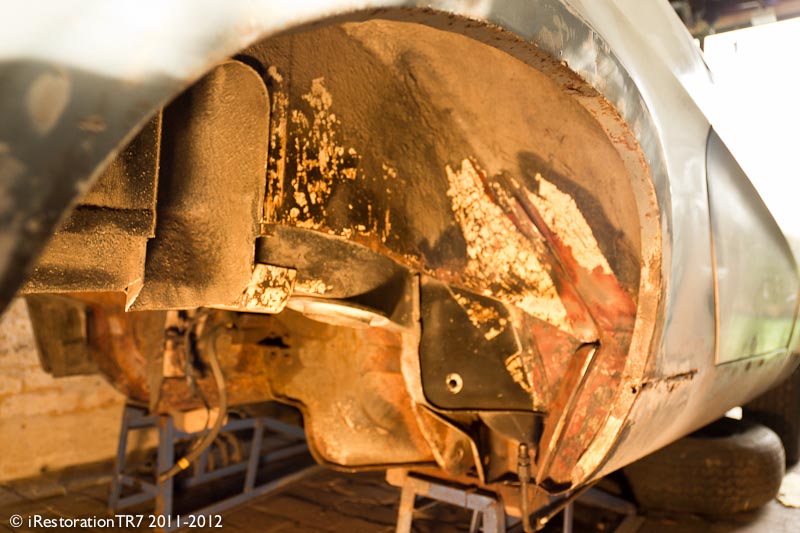
I cleaned out the seam sealer along the bottom of the inner sill joint which with the rusty floor panel I will treat the Hammerite Kurust before cutting out the section that needs repairing.

I also cut out some new plug plates including one for the spare wheel well.

6hrs


Monday, October 22, 2012

Transmission tunnel...

With the gearbox removed I can get on and finish the floorpan. Started by drilling out the pop rivets holding the sound insulation to the transmission tunnel. This also allowed me to remove the old brake pipe that runs along the prop shaft.

After a cleaning off the grease/oil and rubbing down some surface rust with wire wool, I then gave the area a coat of Hammerite Kurust to seal.

1 hr


Sunday, August 12, 2012

Down under pt7...

Finally last of the bl**dy under seal to remove! Front near side wheel arch – not too bad, some minor rust spots will need attention with welding patches.

The outer wing edge is fairly rusty, so depending how bad may consider a repair panel.

5 hrs

Before


Friday, August 10, 2012

Down under pt6...

With the car out of the garage for the second time and both near side wheels up on the ramps, I wire brushed the surface rust off the floorpan, also removing the under seal from the sill.

Cleaned up an area just in front of the trailing arm fixing point which has a split in the metal on the angle – this is going to need repairing.

Also cleaned off the filler from the rear sill/lower panel - not as bad as the other side.

Finished off with a coat of Hammerite Rust Beater.

4 hrs


Friday, July 27, 2012

Down under pt5...

Time to clean up the off side floorpan, with car on rams I wire brushed the driver side floor and propshaft tunnel and lower sills areas.

All in a good order except some dents which I knocked out from the inside. Then painted the area the Hammerite Rust Beater followed by good coat of Stone Clip.

I will be finishing it all off with Waxoyl later.

7 hrs


Tuesday, June 12, 2012

Down under pt4...

Ok so it was my birthday and I spent 4 hours under the car painting!

Using black Hammerite to seal all the rear floorpan from the rear bulk head to the bumper fittings including inner wheel arches and spare wheel floor.

If you look at the last pic showing prop shaft which I haven't touch yet you can see the contrast – when the final Waxoyl is applied it should be well protected.

4 hrs

Before cleaning


Sunday, May 27, 2012

Down under pt3...

After cleaning up the rear floorpan area it was time to tackle the surface rust with a converter. Using Hammerite Rust Beater as my first stage, followed by good coat of Stone Clip. Then I will be finishing it off getting into all the hidden areas with Waxoyl.

6 hrs

My new best friend!


Sunday, May 20, 2012

Down under pt2...

I continued today with the cleaning of the rear floorpan around the fuel tank area and the left side wheel arch, using a hot air stripper to soften the old under-seal. Then with a rag and white spirit to cleaned the surface.

Next step will be to treat the rusty surfaces with a rust converter followed by a coat of black stone chip paint. Then at a later stage the whole underside will be Waxoyl sealed.

6 hrs

Thursday, March 29, 2012

Down under pt1...

Ok time to make a start cleaning off old underbody seal and surface rust from the rear floorpan.

Starting on the right wheel arch, down to the trailing arm and tie bar locating points. Then follow the main chassis beam back to bumper fittings, above and around the suspension area. finally around and under the spare wheel bay.

Above the petrol tank and left hand side to do.

4 hrs